Writing Code for the Nios II System
Write a program for the Nios II CPU connected to the LCD interface
Open a Quartus project containing a Nios II system
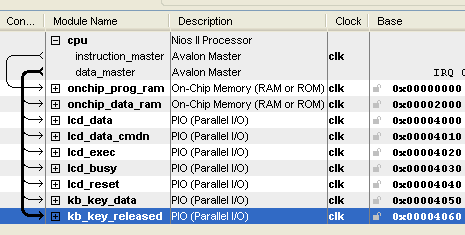
Open the SOPC Builder tools in order to have access to the components and their base addresses. The System Content tab of such a project is displayed in the figure.
Open the Nios II IDE
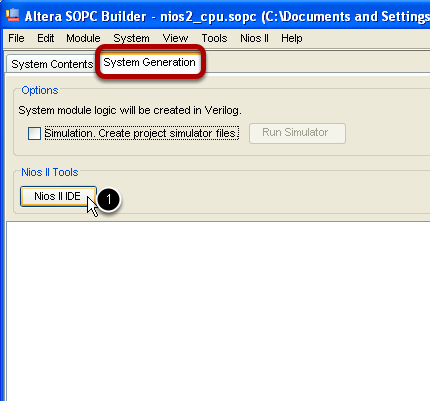
Click on the Nios II IDE button on the System Generation tab of the SOPC Builder as indicated in the image
Create a new Nios II C/C++ Application project
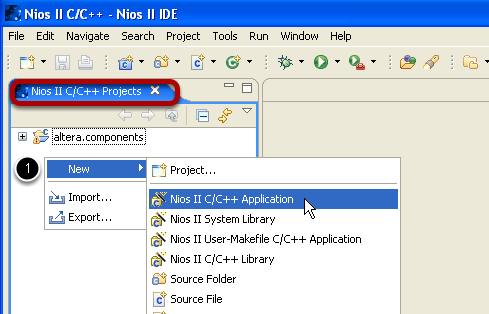
The Nios II IDE is build around the Eclipse project, and have similar functionality to the corresponding Java IDE. Right click In the Nios II C/C++ Projects tab and select New -> Nios II C/C++ Application
Configure the new project
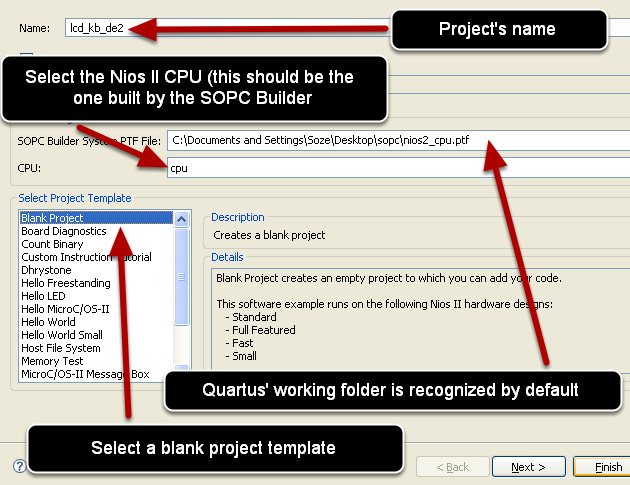
Make sure when creating a new C\C++ Application that the Nios IDE recognizes the system built by the SOPC Builder tool (it automatically selects the ptf file associated with the Nios II system), and select the Nios II CPU to be programmed as in the figure. Press Finish after configuring.
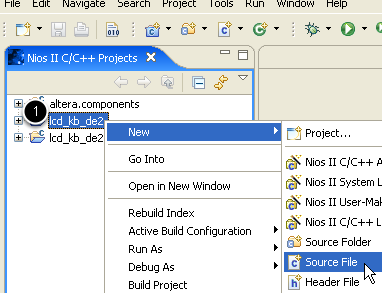
Add a source code file
After creating a Nios II project two items are automatically added to the workspace: the lcd_de2 project (having the name provided in the previous step) and another one lcd_de2_syslib, associated with the Nios II system memory chips programming (it deals with building files for programming the RAMs - instructions and data RAMs).
Add a source file by right clicking on the primary project (lcd_de2 in the figure) and select the Source File menu as shown.
Add memory pointers for accessing the interfaces
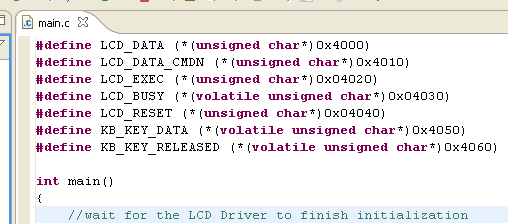
Before writing any code, build a set of pointers used throughout the program for communicating with the interfaces connected to the Nios II CPU in the SOPC Builder tool. In this example, the "#define" directives used are shown in the figure. The first one, LCD_DATA defines a memory pointer addressing the 0x4000 address, which according to the memory mapping displayed in the first figure, corresponds to the 8-line parallel output (PIO) interface commanding the LCD data lines. Whenever a character need to be sent to the LCD, its corresponding configuration will be written at the LCD_DATA address (the Avalon fabric assures the data is actually sent to the LCD interface connected to the Nios II system - refere to the Quartus SOPC Project tutorial for detailed informations). Similar "#define" directives are constructed for the DATA_CMDN and EXEC lines of the LCD (responsible for selecting data or commands to be sent and initiating the execution respectively). Similarly were constructed defines for the communicating with the keyboard. In fact the 7 "#define" directives match closely the interfaces in the figure of the first step.
Write the C program and compile it.
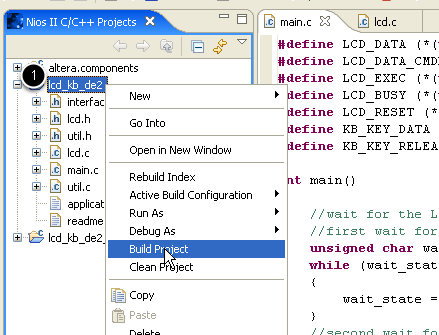
After the code was written, the project is built by right clicking it in the workspace and selecting Build project menu as in the figure.
Important: After compiling the Nios II C/C++ project, in order for the modification to become visible, the entire Quartus project needs to be recompiled. After a modification of the Nios II system's structure (in the SOPC Builder tool), first, the "#define" directives need to be corrected, followed by Nios II project's rebuild and by the Quartus's project recompilation.
Sample C code to be run by the Nios II CPU
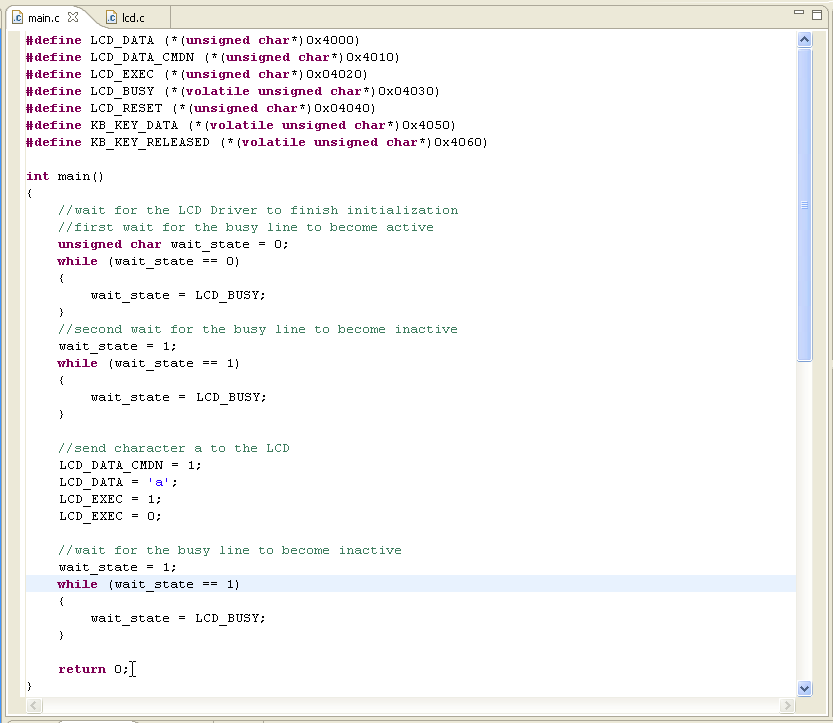
For the case of a Nios II system controlling the DE2's LCD, the attached figure depicts a section of the code used for writing the character "a" to the LCD and finally testing the busy line of the LCD Driver for completion